Very often, Photoshop users need to bend a line to get different shapes. So, many of them ask about how to bend a line in Photoshop and bend a straight line in photoshop. Both the questions are the same, and you can do them in different ways.
Still, there are different ways; we prefer using the pen tool to bend a line in photoshop elements. So, this content will show you the easiest way to use the pen tool in Photoshop to bend a line. Let’s check it out.
Table of Contents
How to Bend a Line in Photoshop: Step-by-step Instructions
Using a pen tool is very easy, especially when you use it to make a curved line. Well, you can bend a line in Photoshop elements with a few easy steps. But first, you need to learn how to draw a straight line and then make segments to bend it. The steps below will cover the whole process shortly.
Step 1: Open Photoshop

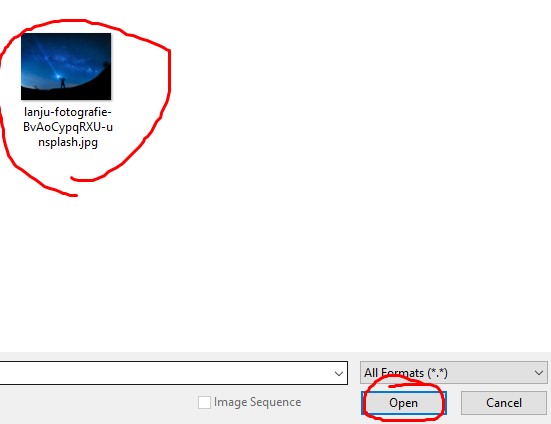
As you have to bend a line on a photo in Photoshop, you need to open it in the beginning. Just DoubleClick on the Photoshop icon on your PC. You will get the home page of Photoshop.
When you open it, you need to open the image where you want to make a line. Click on the project, and you will find it in the Photoshop editing control section.
Step 2: Select Pen Tool

It would help if you found the pen tool on the left bar of Photoshop. The pen icon looks quite like a fountain pen nib. You need to click on it to start bending a line. Remember that you will find it in the middle part of the left-hand toolbar. When you click Pen Tool, instantly, you will get the pop-out menu.
Related Article: How To Make A White Background Transparent In Photoshop With 3 Easy Way
Step 3: Positioning the Cursor

You need to place the cursor on the point where you need to bend the line. Make sure to do it before starting drawing the line. After selecting the pen tool, you can choose any point on the image to position the cursor.
Step 4: Starting Point Setting

At this point, you need to fix a place where you will start. Just set the point and the slope of the curved line on the imager right over the cursor. For this, you need to click on it and then drag the cursor following the direction toward which you are planning to arc the line.
Right after that, you need to release the mouse exactly when the point reaches the top of the curve. Remember that the point where you release the cursor is the same point where the curved line’s apex will reach initially.
Step 5: Create the Second Point of the Curved Line

Now, you have to create a curved line’s second point to complete it. For that, you have to click on the point and continuously move it to where you want the line to get the connection with the initial starting point. After that, make sure to drag the mouse in the direction opposite of the direction you dragged it when you had set the slope.
Suppose you are creating an “S”-shaped curve. So, you have to drag the mouse cursor in the same direction as when you set the slope. Just make sure that the curved part is bent enough to make the appropriate shape.
Step 6: Shape It Properly

You are about to complete the process. So now, you have to add more curves to the line to make the appropriate shape. You can click on it and hold it to the next point of the line. Next, you have to drag the mouse to set the curve properly.
Closing the Curve
Lastly, you have to close the curve to save the shape. When you are sure that the line is okay and you need no customizations anymore, you can close the curve. You can do this by hovering the cursor on a hollow line point. Right after that, you have to click it once again to find the small circle that appears on the cursor. That’s it.
So, this is how you can make a straight line and then bend it. If you don’t like to use the pen tool, you can use the curvature pen tool. The process is also very easy, and we will try to make another content to disclose the process.
Final Thought
Hopefully, you have understood the whole process of how to bend a line in Photoshop. Still, if anything bothers you, ask about it in the comment section. It will soon come with something new and helpful for you. Till then, stay healthy and happy. Thank you for your time and support.
Sometimes you need a clipping path service for any images, I recommend to you – choose Clipping path NYC for outsourcing. They have dedicated photo editors of all image editing services.


